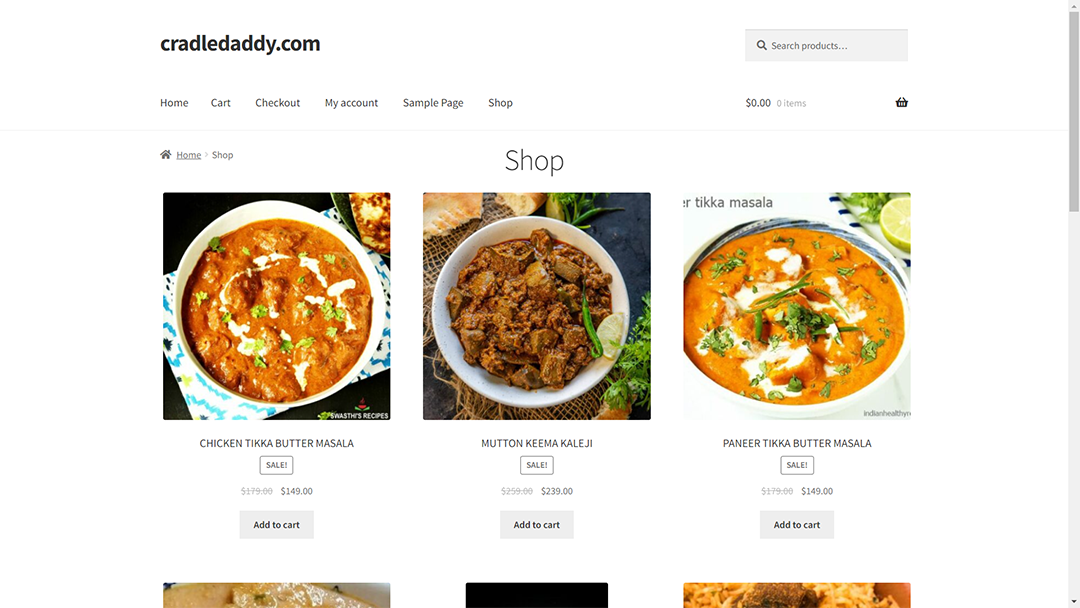
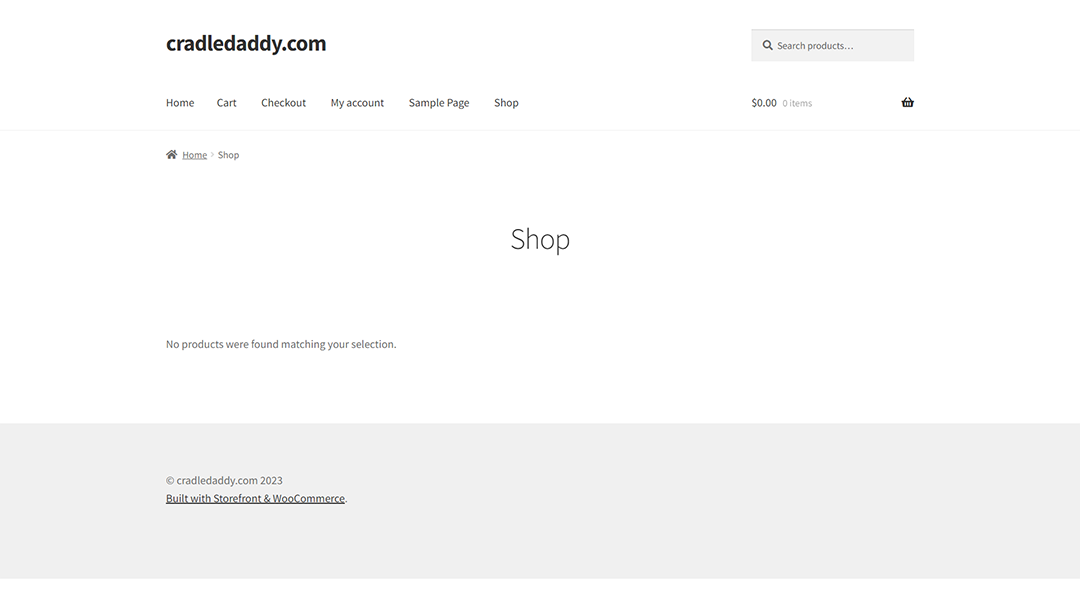
This is a standard display. You can change themes / buy paid themes to get a WOW effect. You can also use lots of plugins available in WordPress ecosystem to make your ecommerce site better.
Our website “cradledaddy.com” looks like the above. It does not have any relation to your ecommerce site and it is only used for demonstration purposes.
The article is divided into 5 major sections
Step1: Cloudways Configure
Step2: Register with Bilzee
Step3: Configure Bilzee
Step4: Connect to your site
Step5: Publish Items to Ecommerce Site
The article is step by step follow through but still if you face any issues you can write to us: support@pearnode.com
Step1: Cloudways Configure
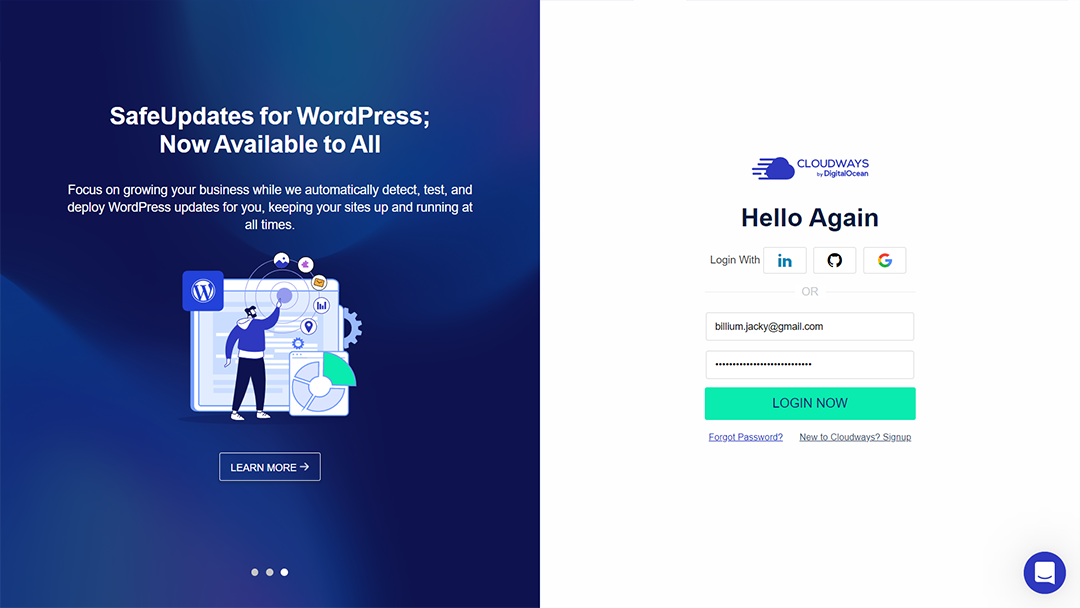
a) Open cloudways.com in your browser > Login with your google sign in/Username and Password
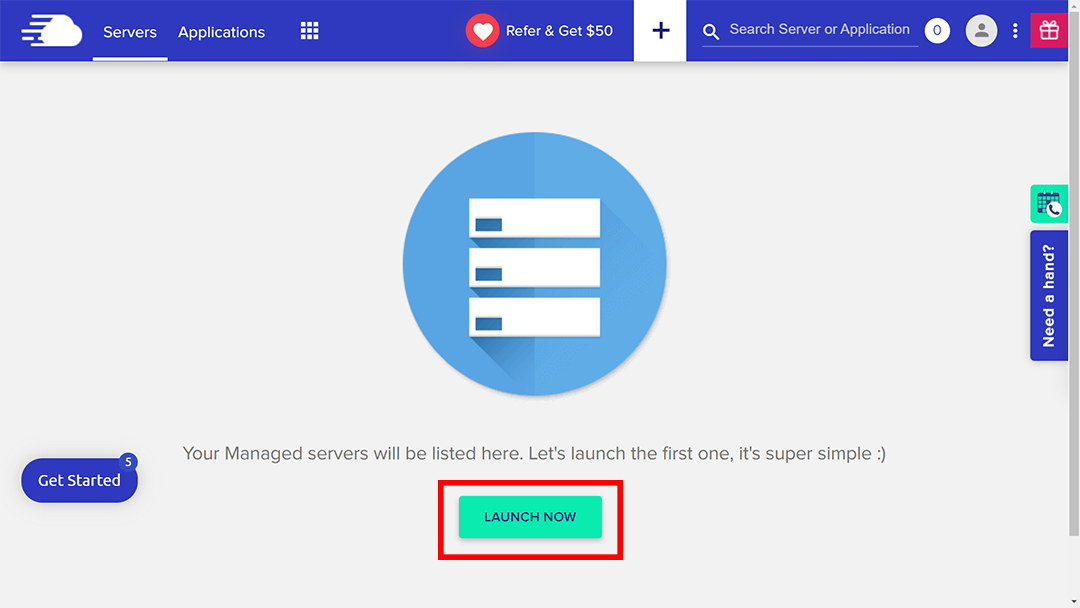
b) Click on the “Launch Now” button
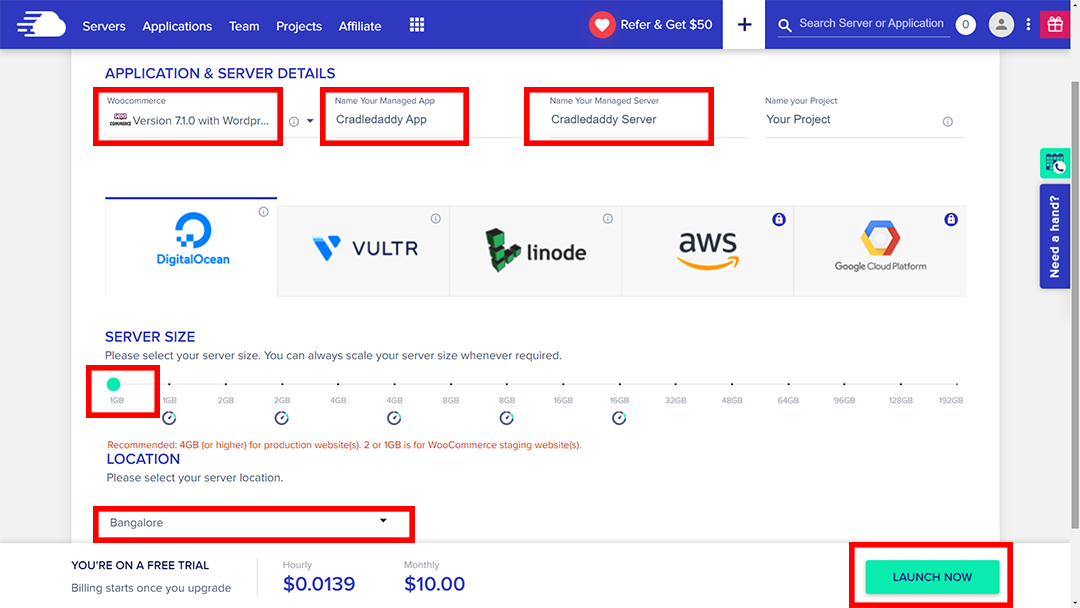
c) Deploy Your Managed Application: Choose “Woocommerce” > “App name” > “Server name” > Server size “1GB” > location “Bangalore” > click on the “Launch Now” button
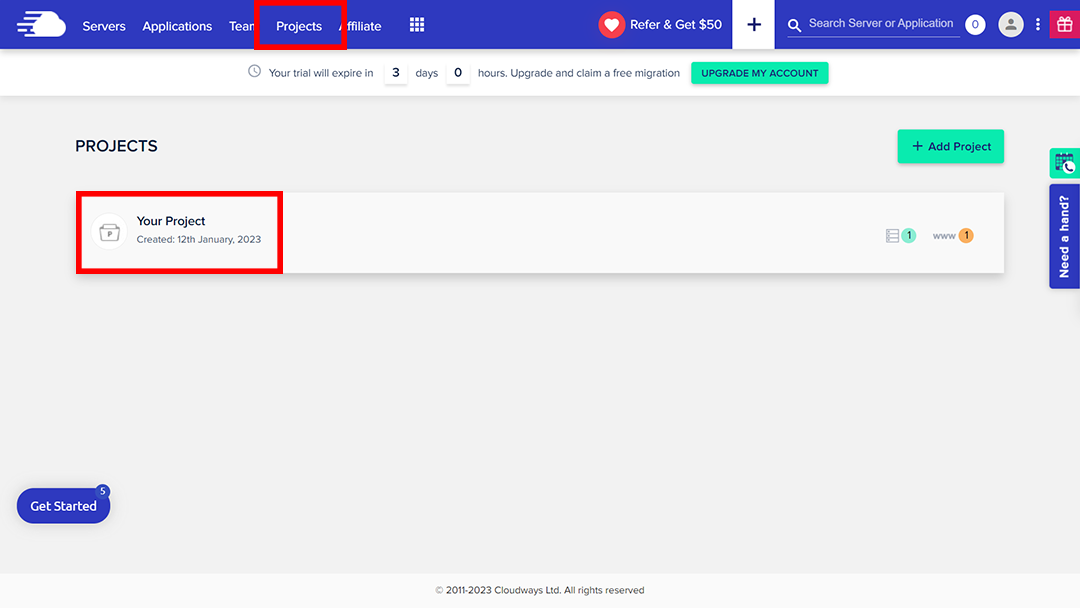
d) Got to “Projects” > click on the “Your Projects”
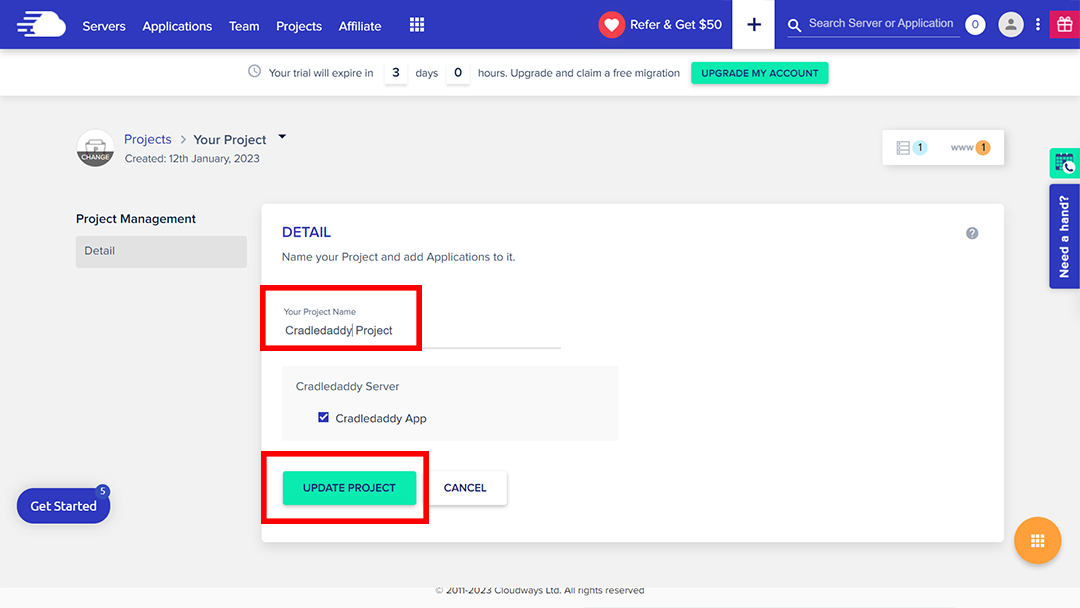
e) Enter Your Project Name > click on the “Update Project”
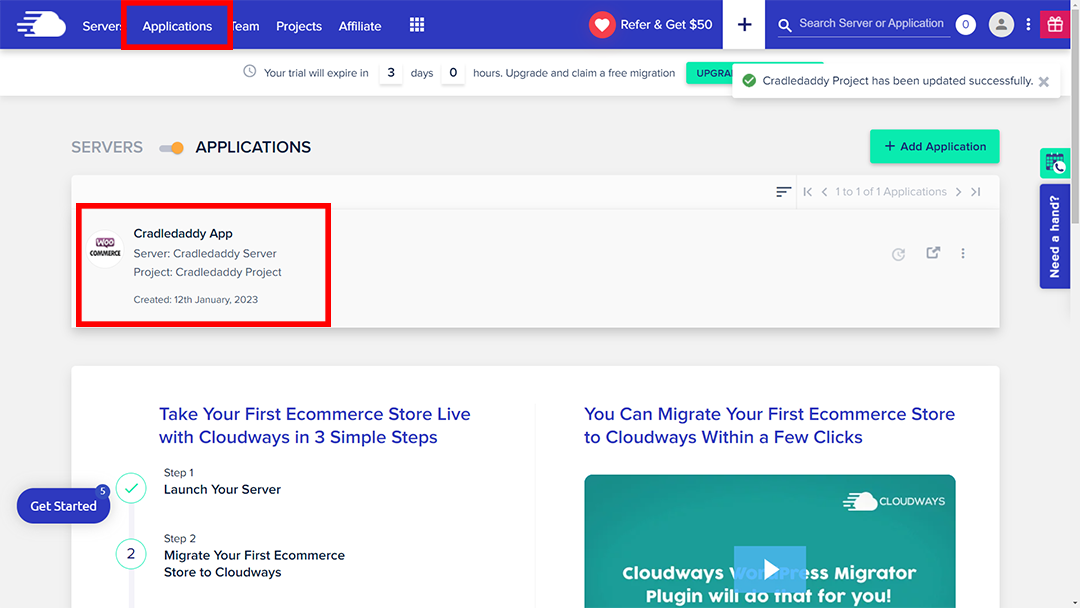
g) Go to “Applications” > click on the “Your App Tab”
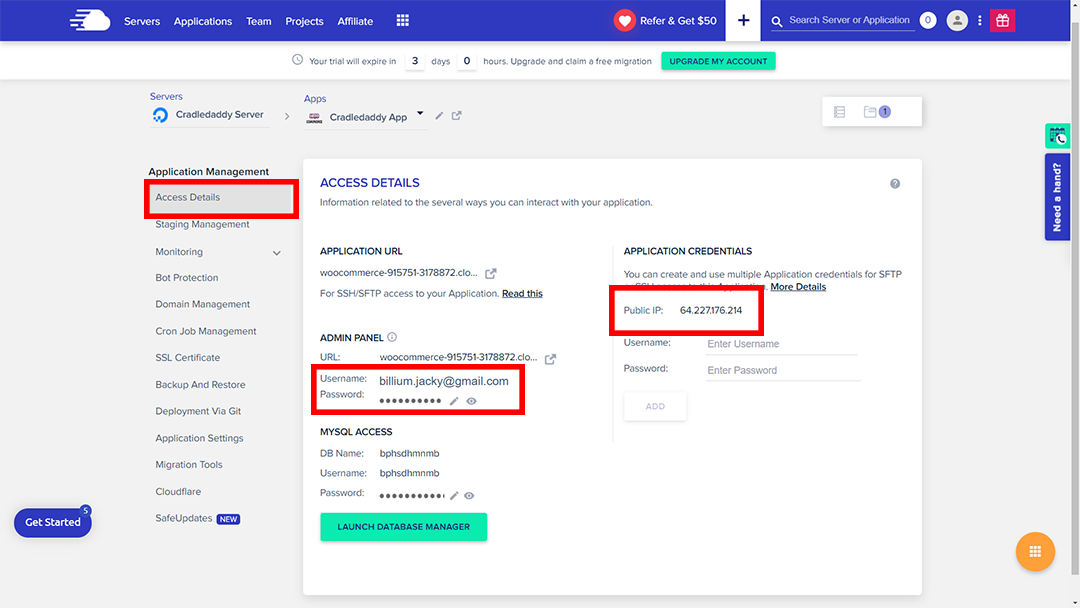
f) “Access Details” > copy the “Public IP”, “Username” and “Password” in Notepad
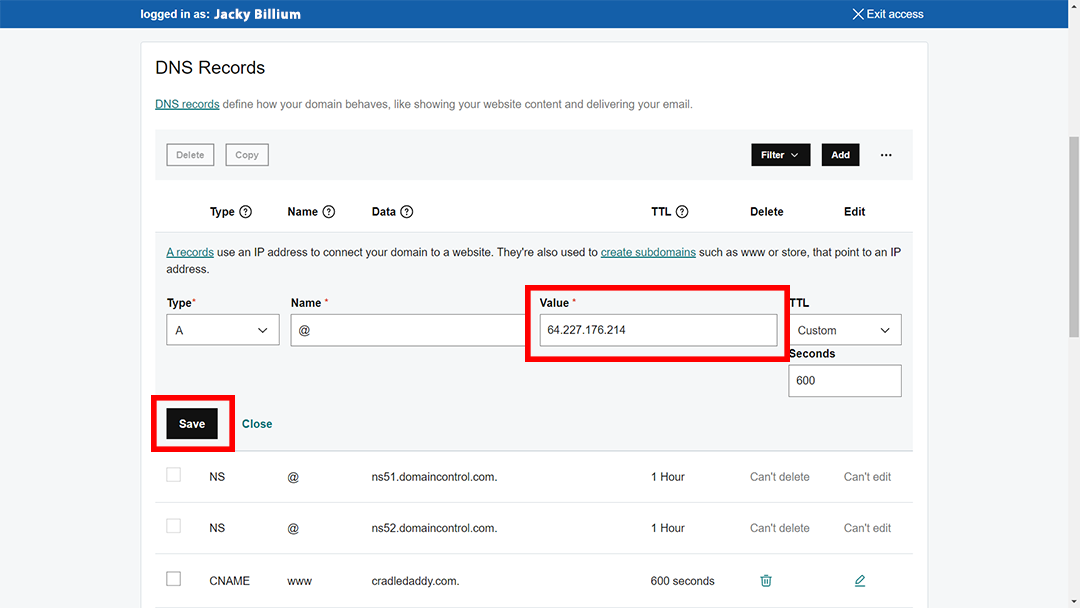
h) Go to your “Hosting” > choose your “Domain” > DNS Records > Edit Public IP and paste new IP > Save
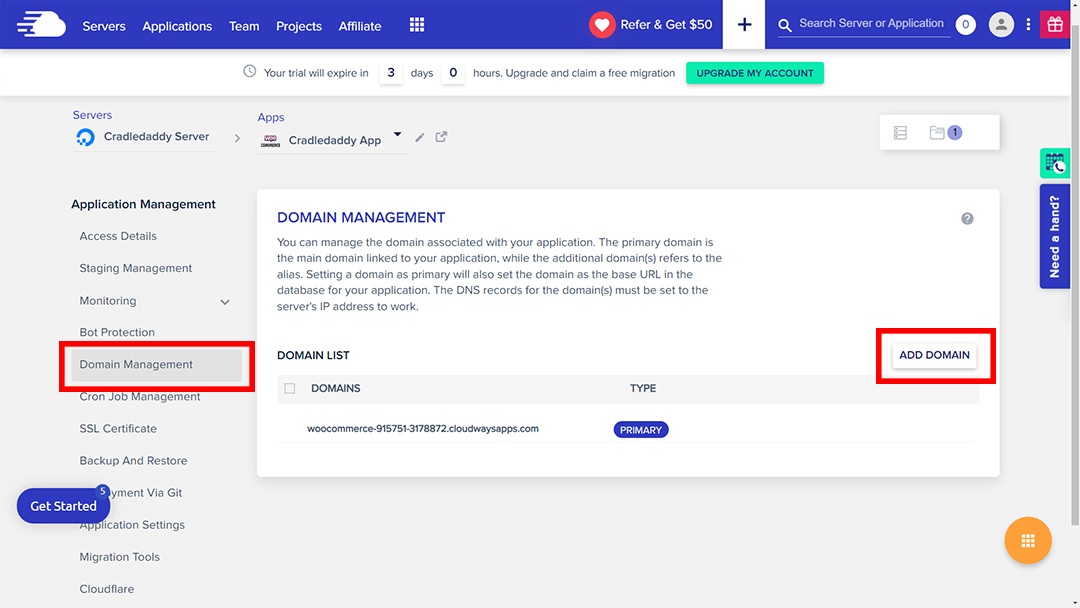
i) “Domain Management” > add Domain
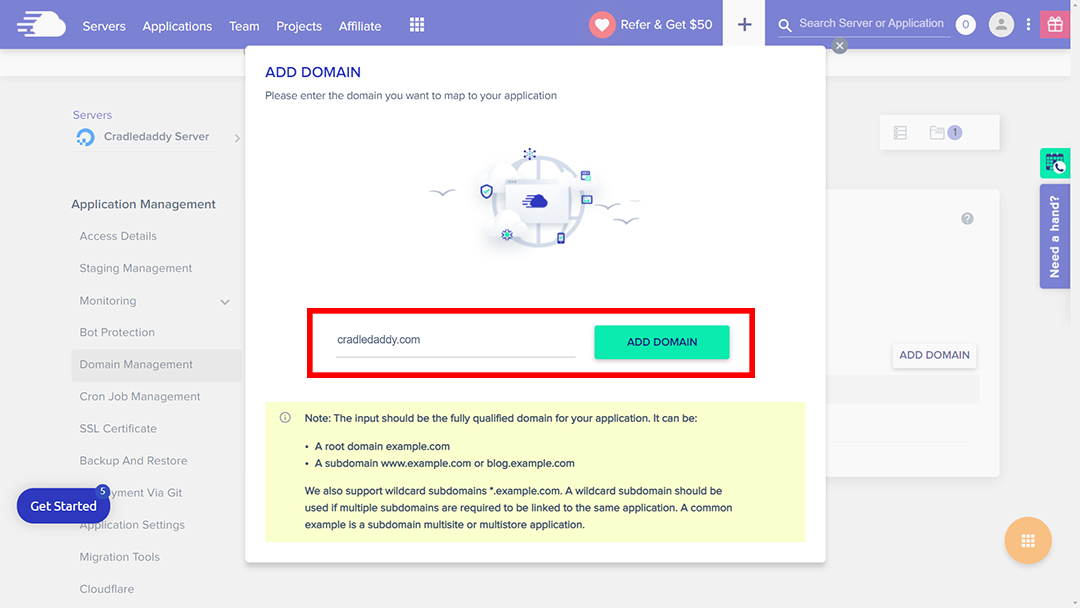
j) Enter your domain name > “Add Domain”
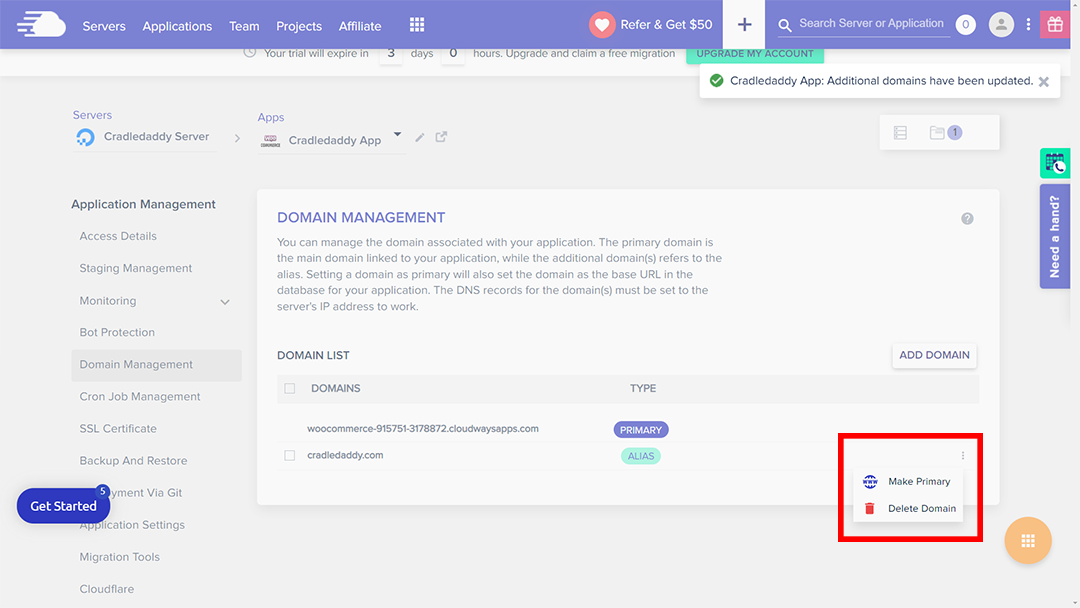
k) Make your domain as a “Primary”
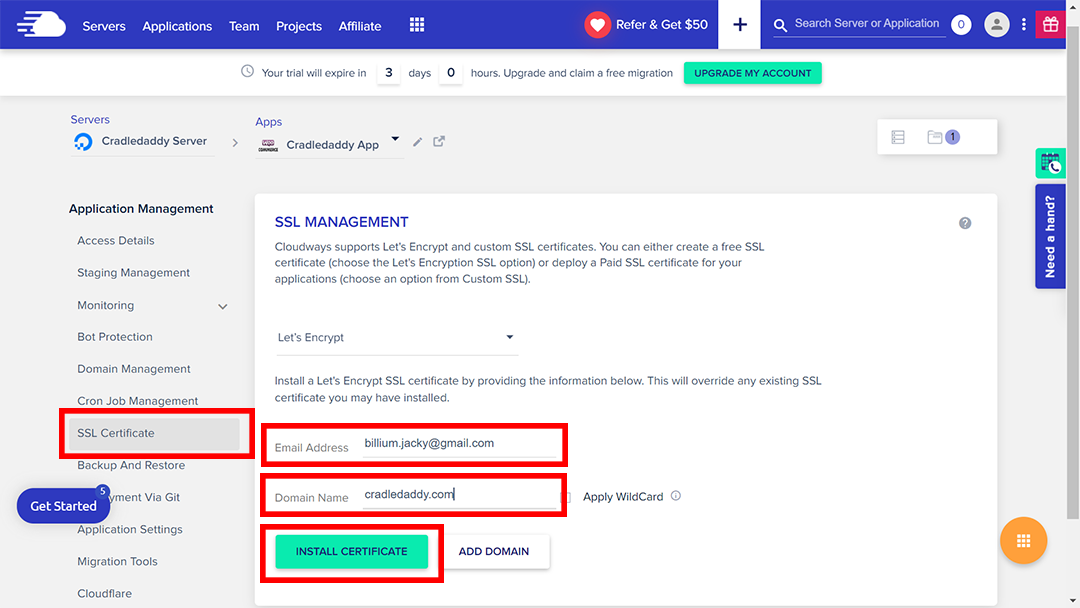
l) Go to “SSL Certificate” > enter your register “Email address” and “Domain Name” > click on the “Instal Certificate” button
m) Your site should look similar to this after Cloudways configure
Step2: Register with Bilzee
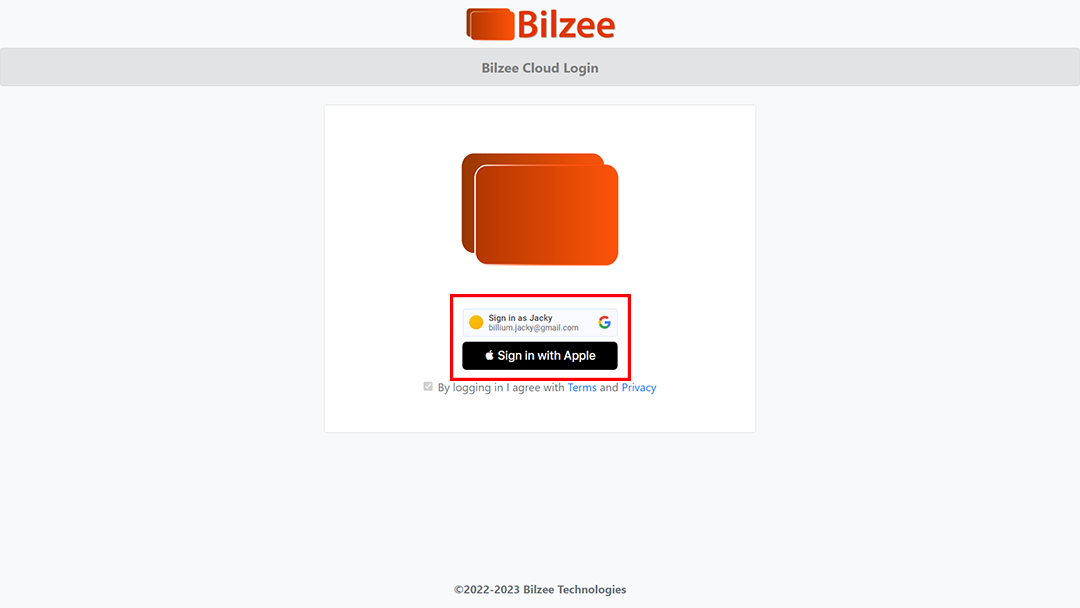
b) Sign in with “Google” / “Apple” id. (This is a passwordless system and please make sure that you own and use the same email with bilzee)
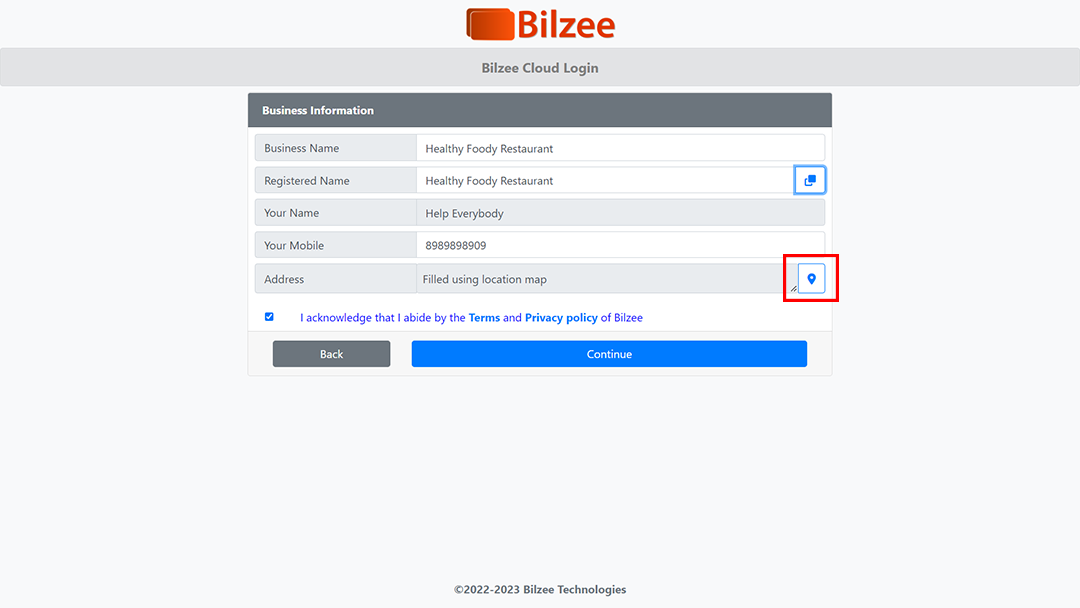
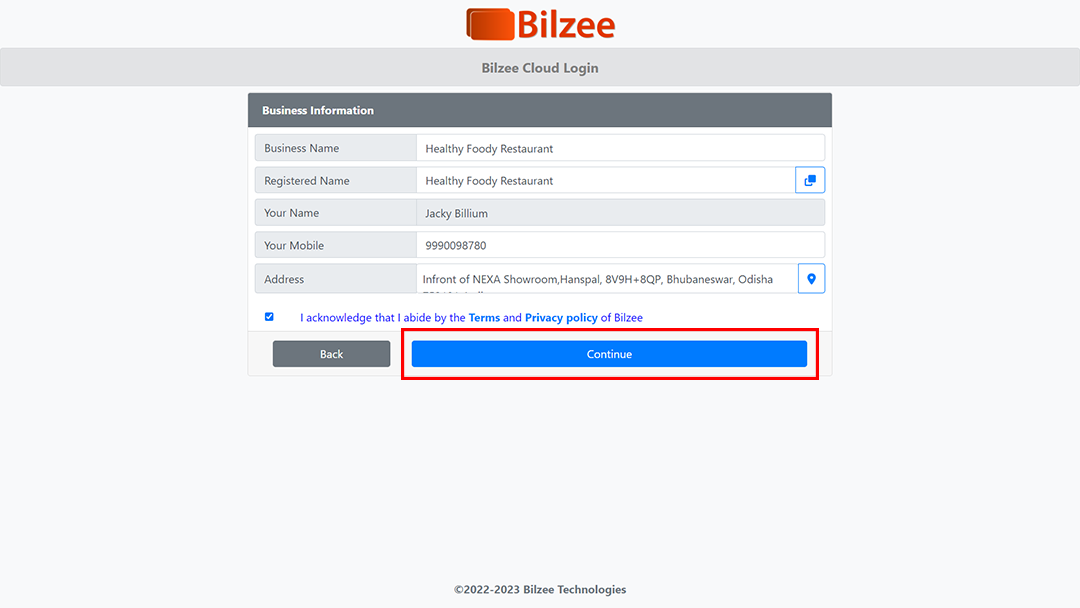
c) Fill your Business Info:
Brand name is the name by which your brand will be identified and registered name will be your government registered name.
If using Google account your name will be auto populated but in case of Apple you may need to fill your name.
Please enter the correct mobile number as we do not ask for OTP verification.
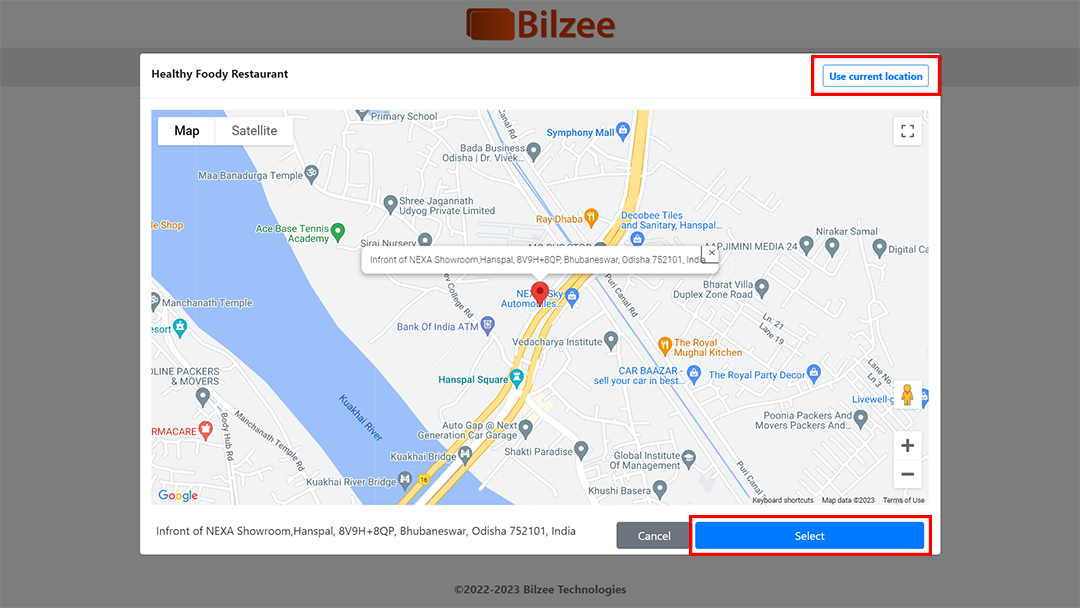
d) Your business address is mandatory and has to be populated using Google Maps verification.
This is to ensure that your shipping and payment locations are accurate.
Once you open the map view you Click “Use current location” button on the top right of the box to assist in the address selection
e) Change the prefilled address as per your proper address as required. Then press “Continue” to register
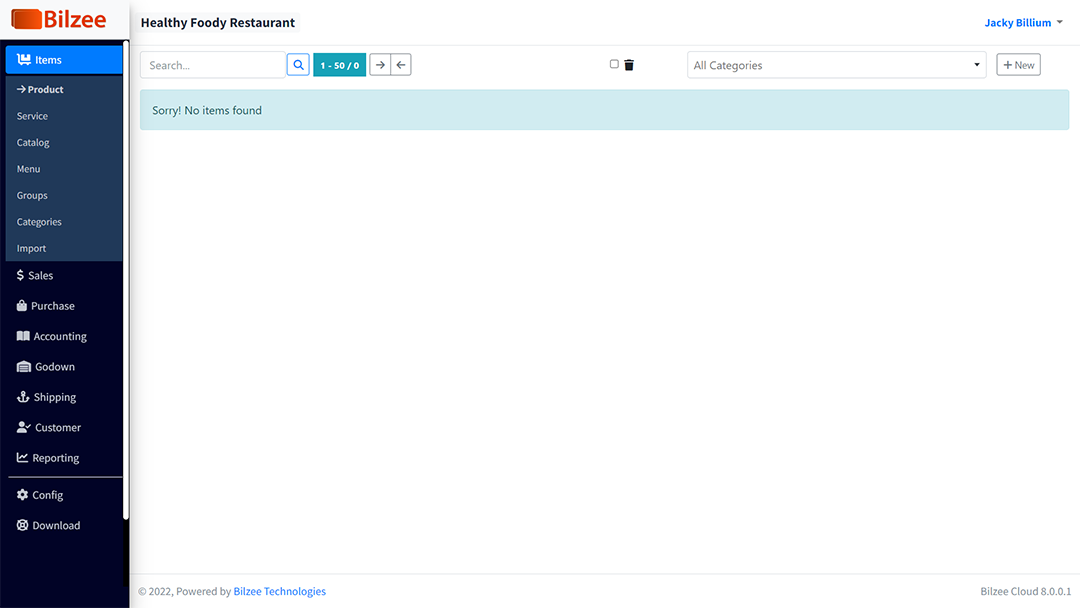
f) Once registered you should view the “Product Listing” screen.
This means the registration is successful and its showing that you do not have any products listed in Bilzee Ecommerce Console.
Step3: Configure Bilzee
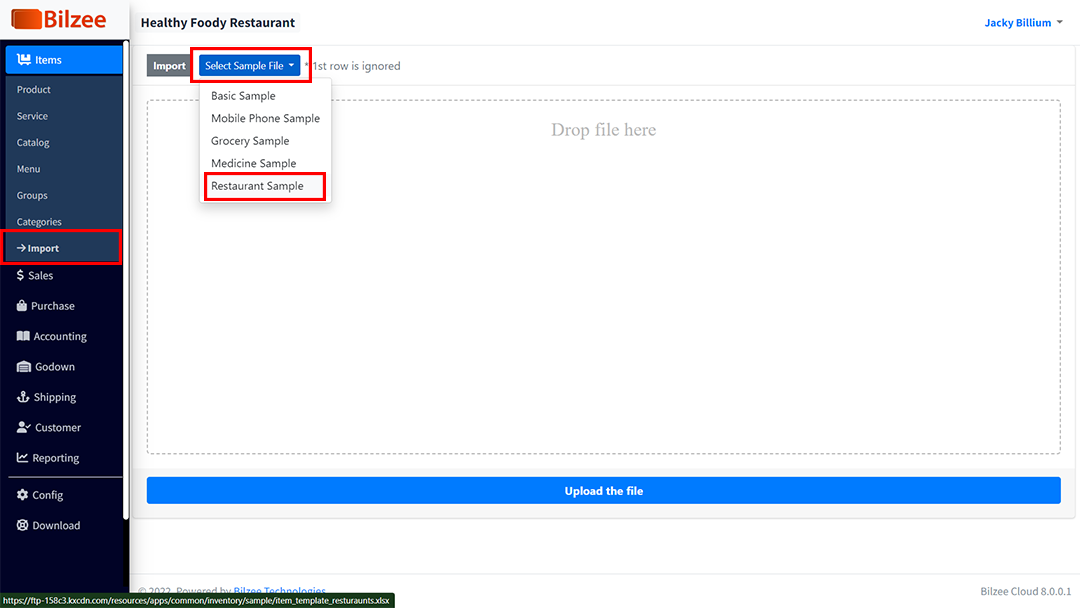
Goto Items > Import – Upload the sample provided
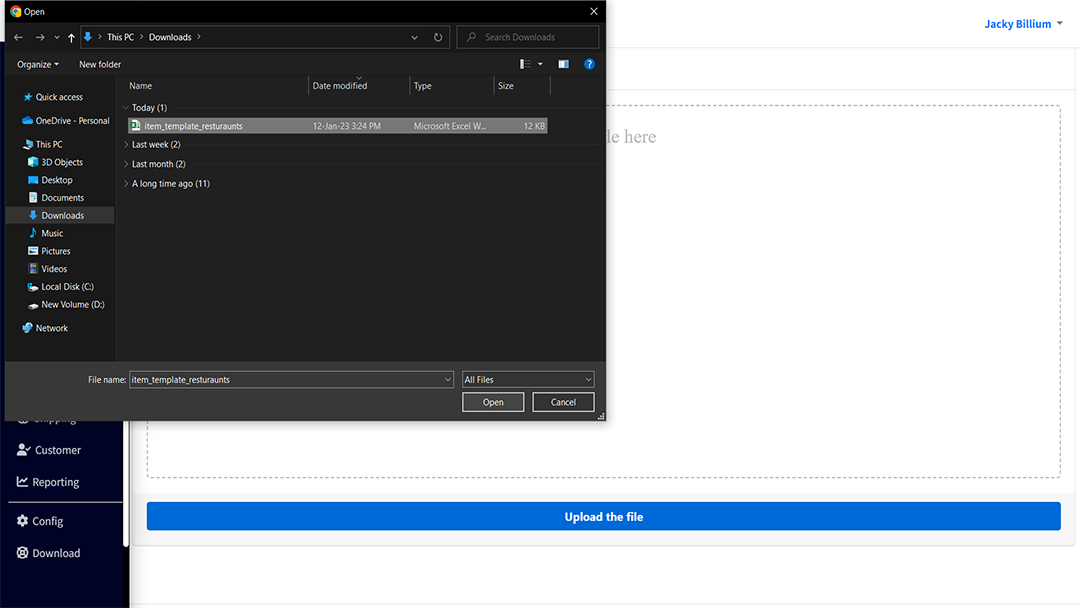
Click on the “Upload the file” > Choose your “Item Excel Sheet” > Open
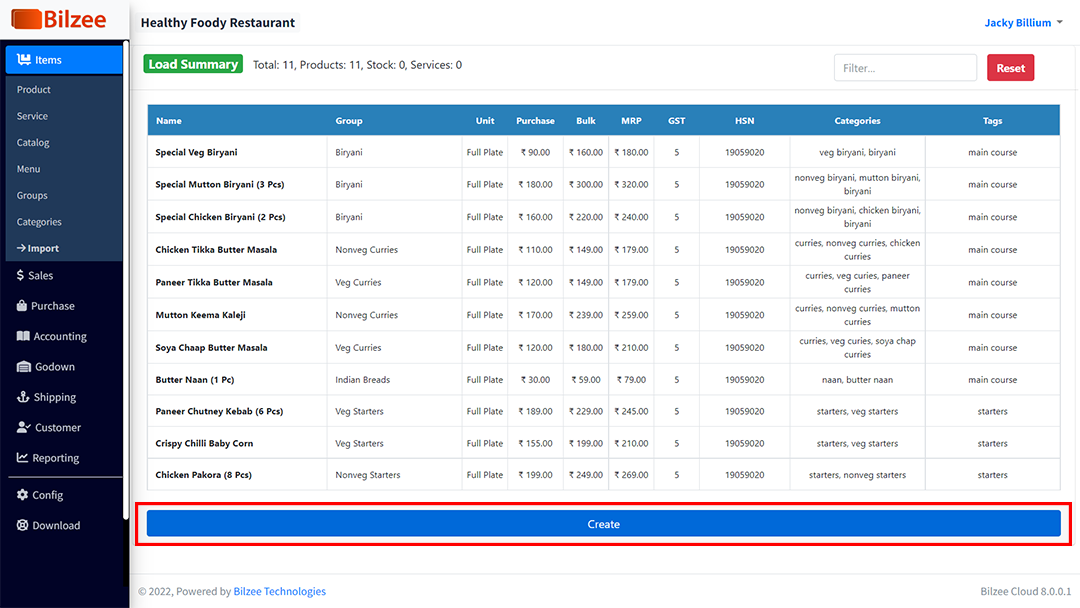
Check your all items > click on the “Create” button
It should take 30 – 60 secs approximately to create all the items
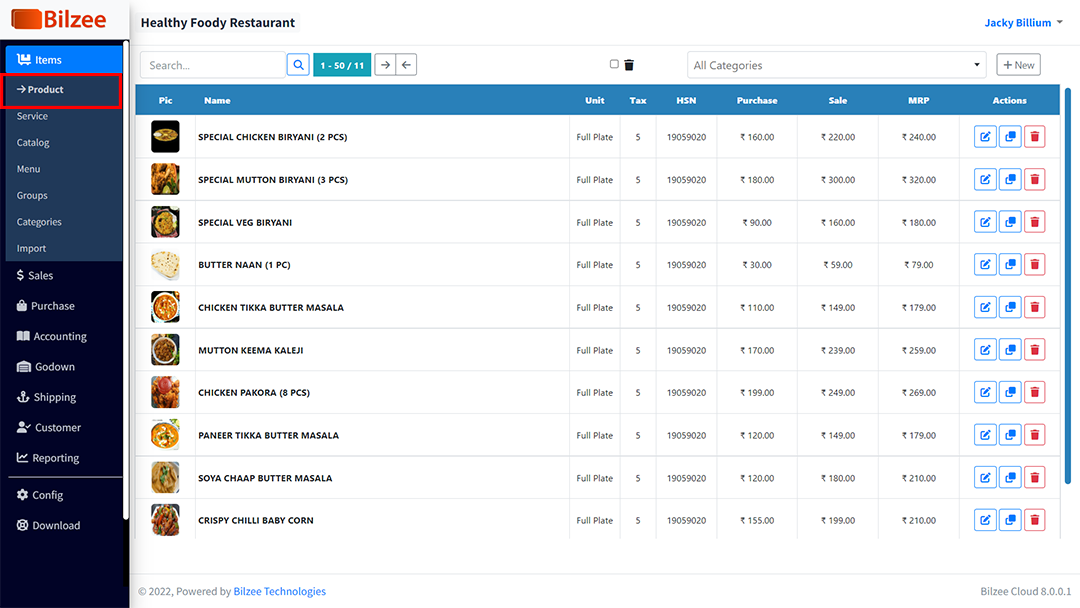
Go to Items > Products > here you can see and change your items as required.
Now your items are ready you need to publish the items to your ecommerce enabled site.
Step4: Connect to your site
From inside the Bilzee Ecommerce Console
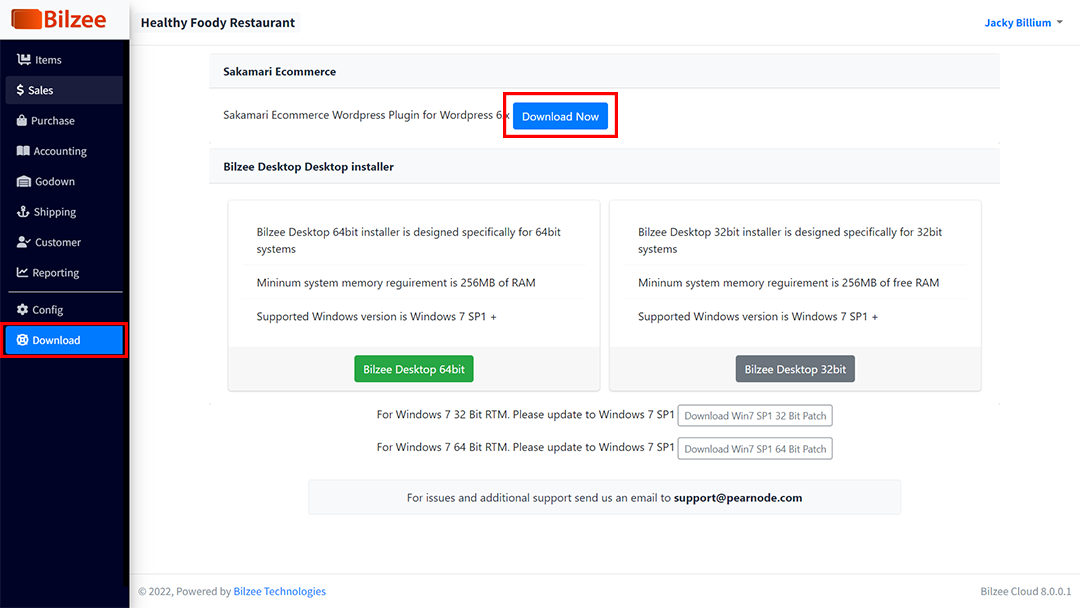
Go to “Download” > Download the Sakamari Ecommerce plugin from Bilzee
Bilzee Ecommerce plugin is used to connect Bilzee Retailer Console to your site.
Download the plugin to your local system.
Now,
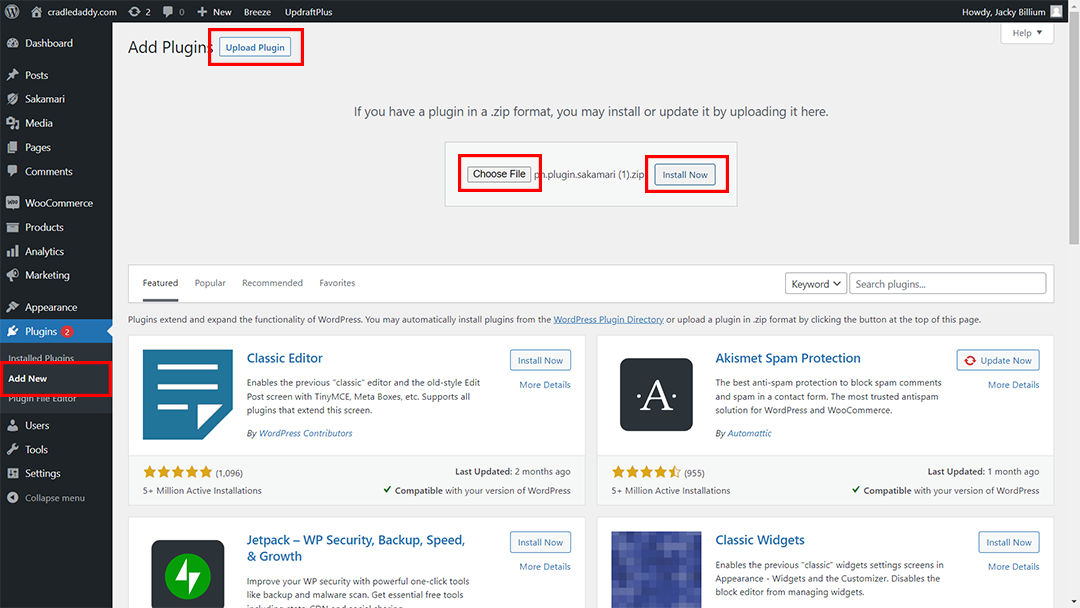
Login WordPress site > Go to “Plugins” > “Add New” > “Upload Plugin” > “Choose File” (Select the downloaded plugin) > “Install Now”
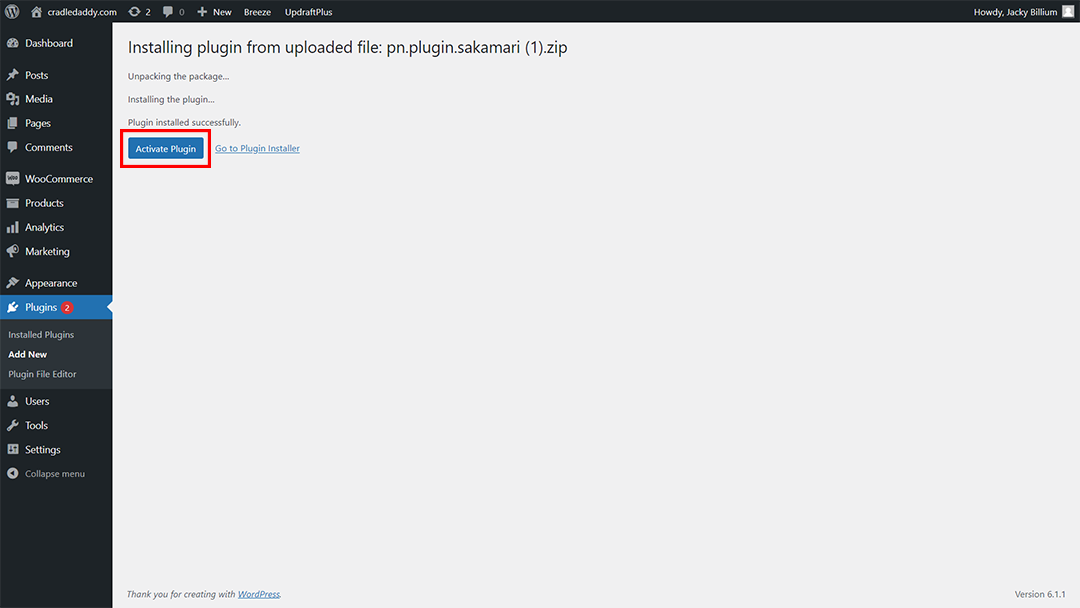
Click on the “Activate Plugin” button
When you press Activate the plugin activation process starts
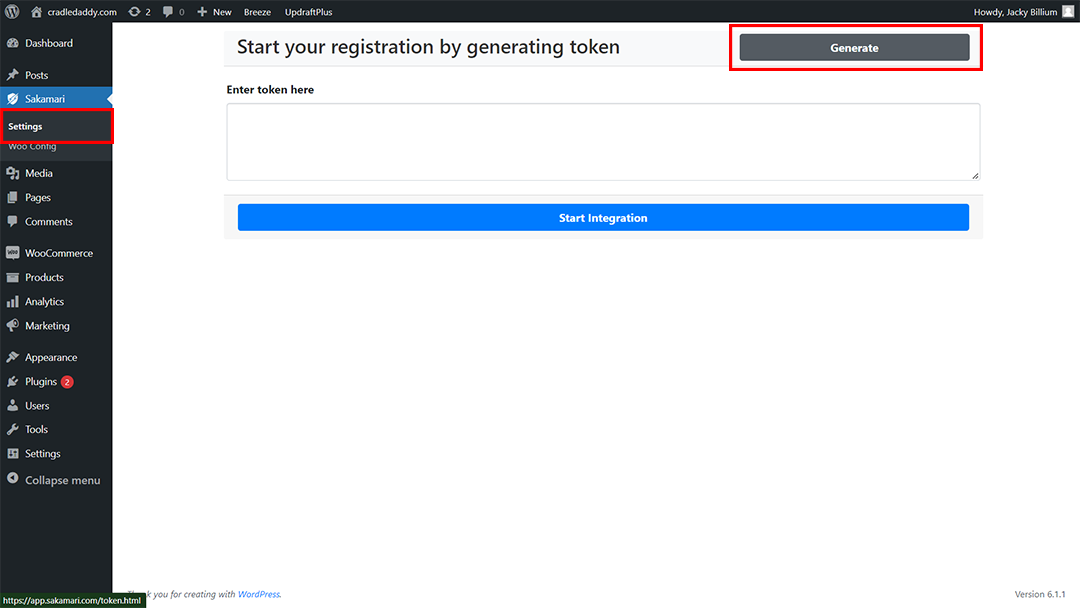
Connect Sakamari with Bilzee
Press the “Generate” button to generate the connect token.
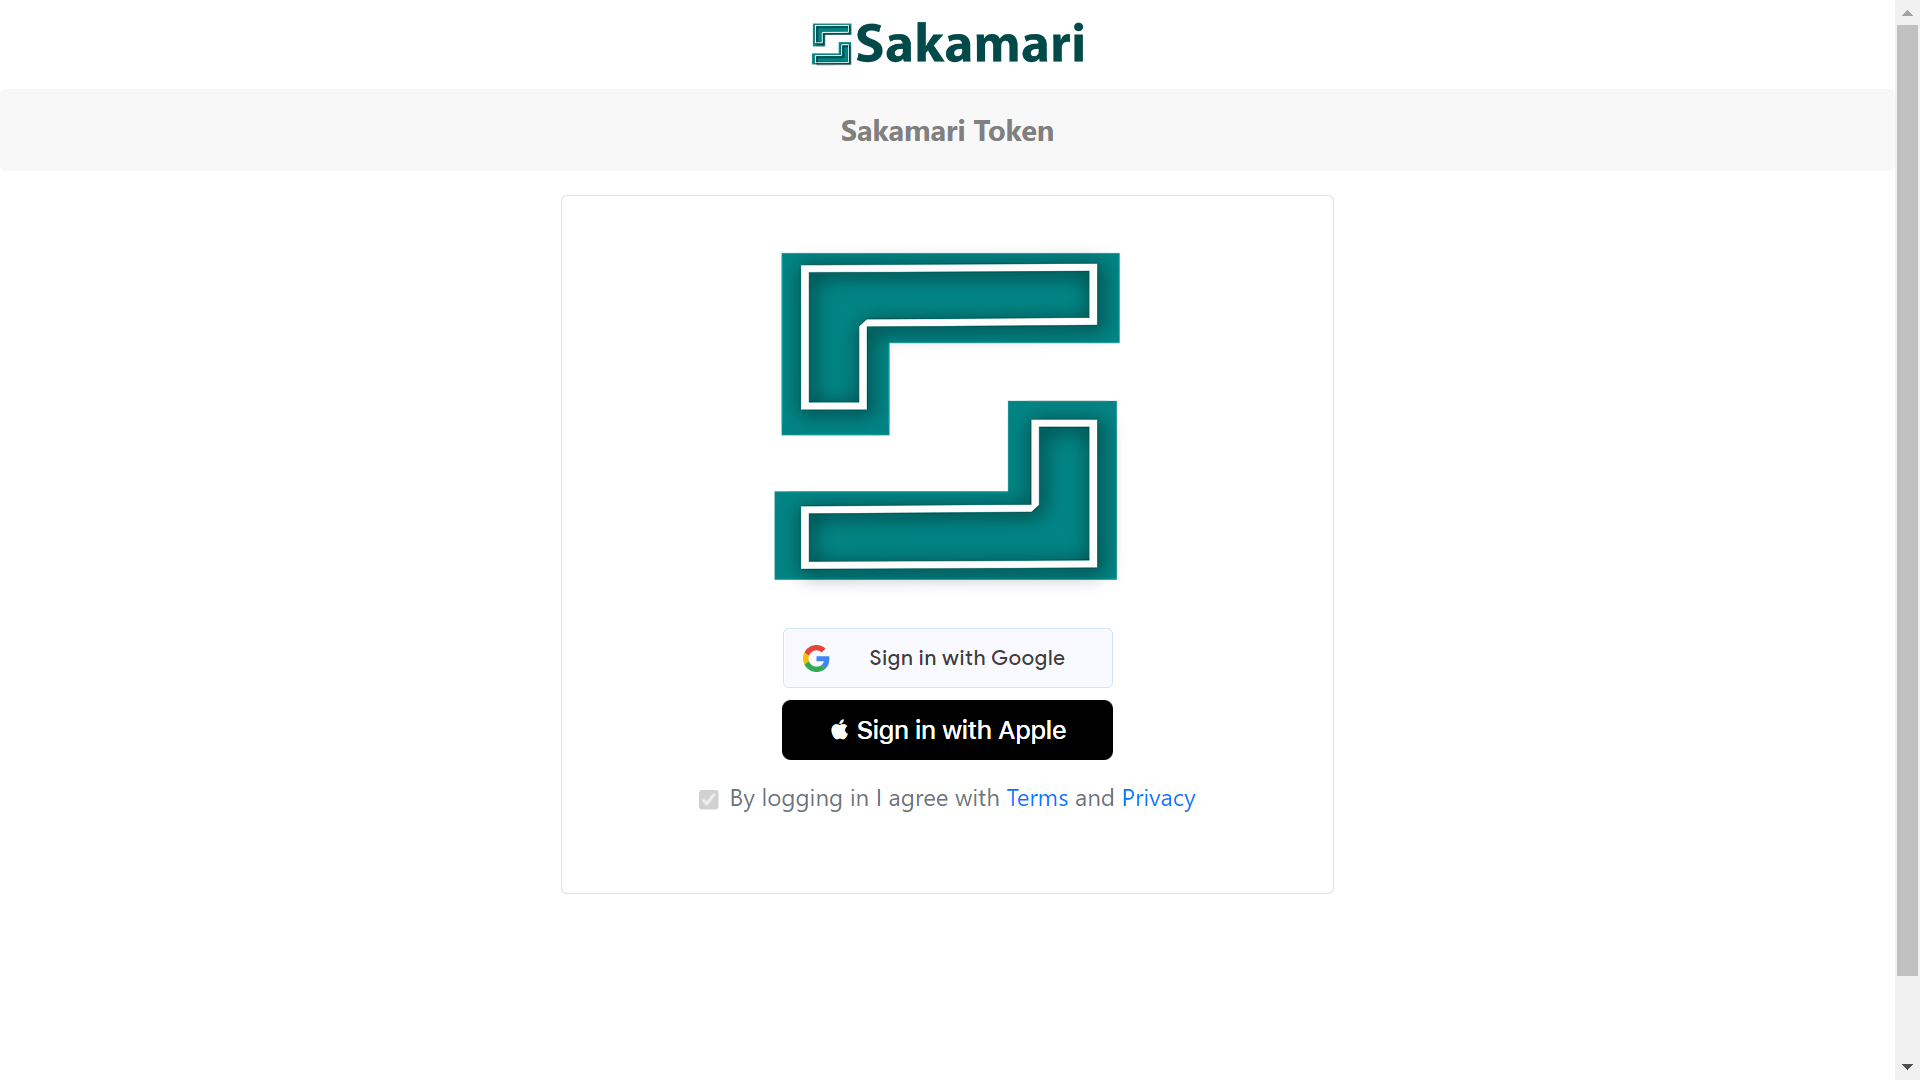
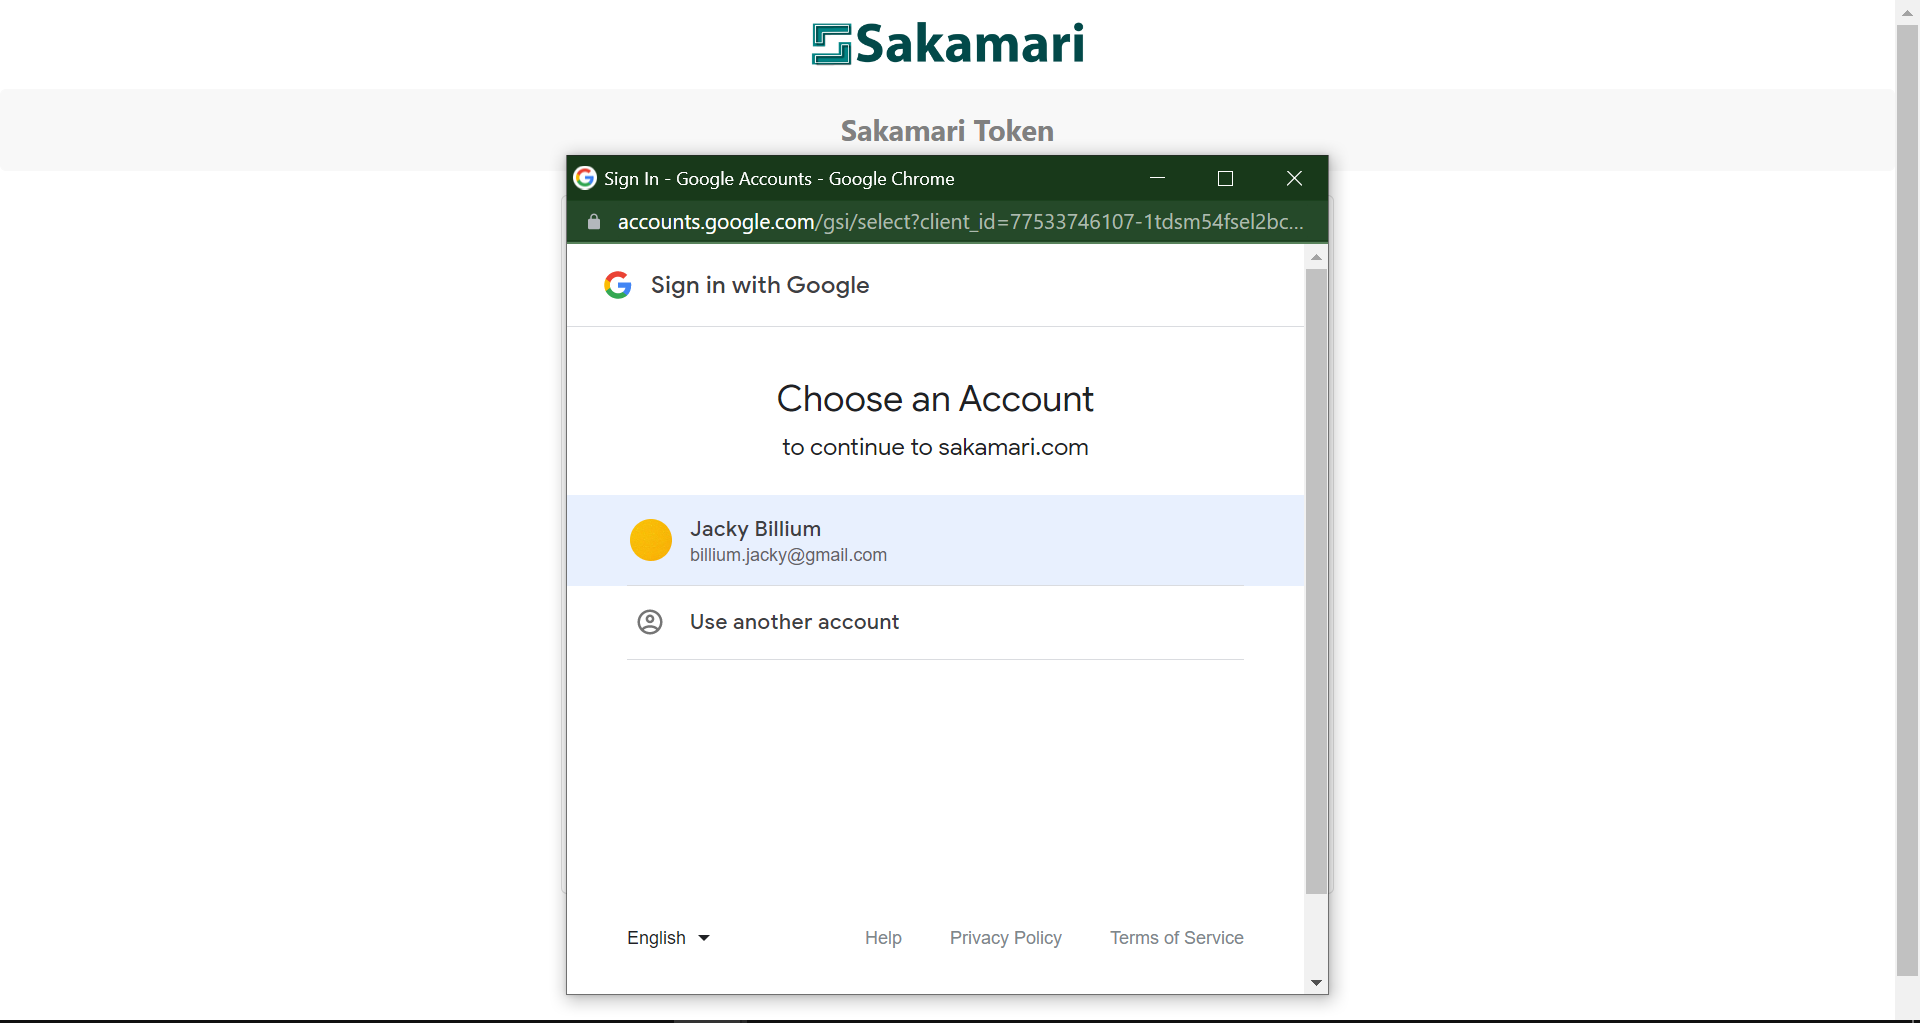
The new window should show the Sakamari login screen. Use the same account that you have used to register with Bilzee
Select the Email Account to proceed.
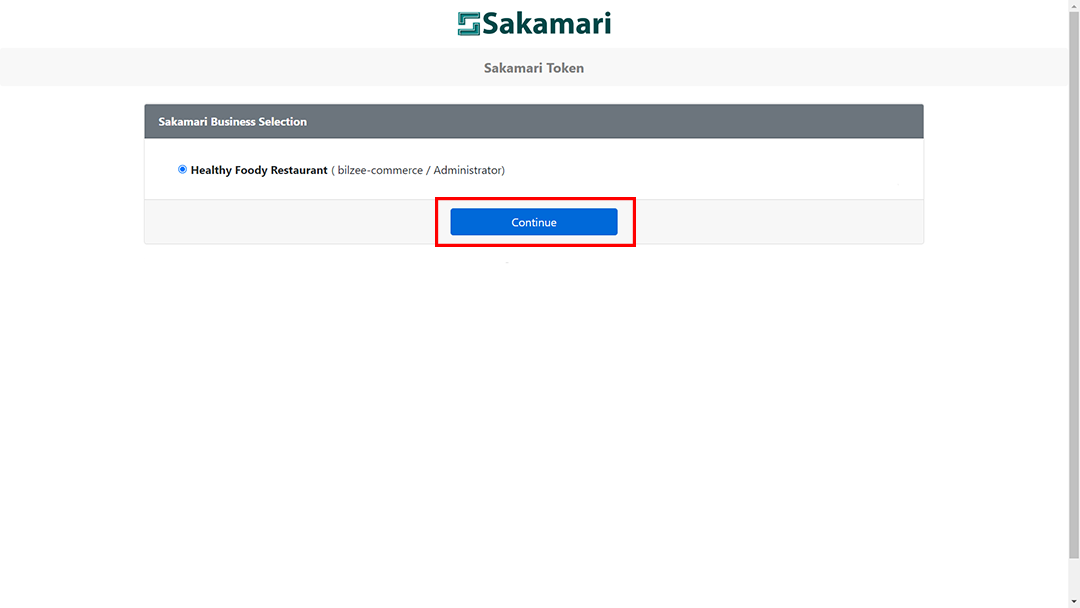
Check that the business you created matches the Bilzee business and continue
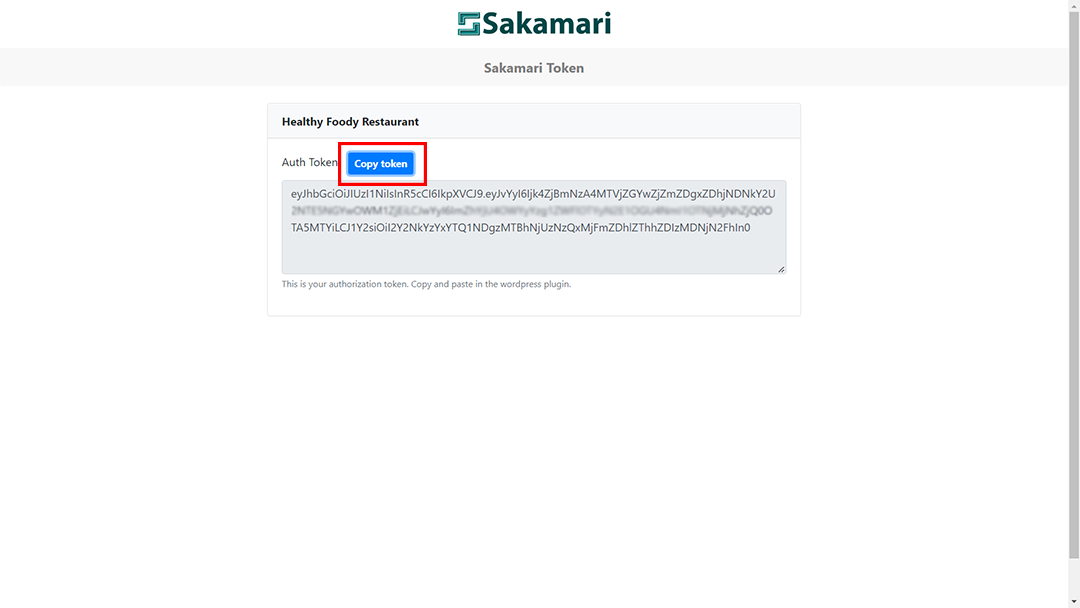
Copy the token by clicking on the “Copy Token” button
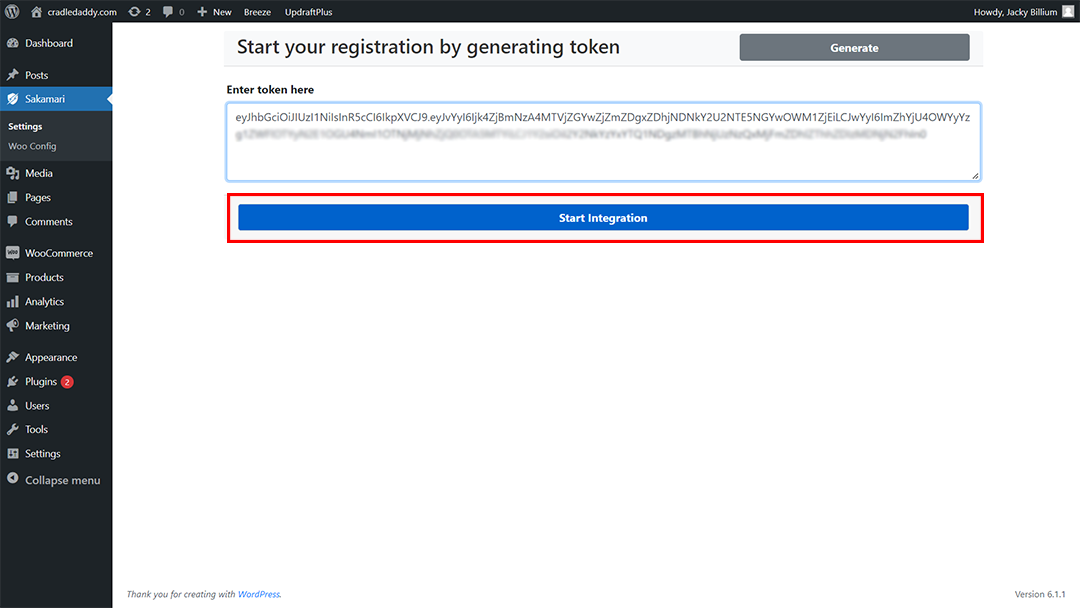
Paste the token in the text box and click “Start Integration” button.
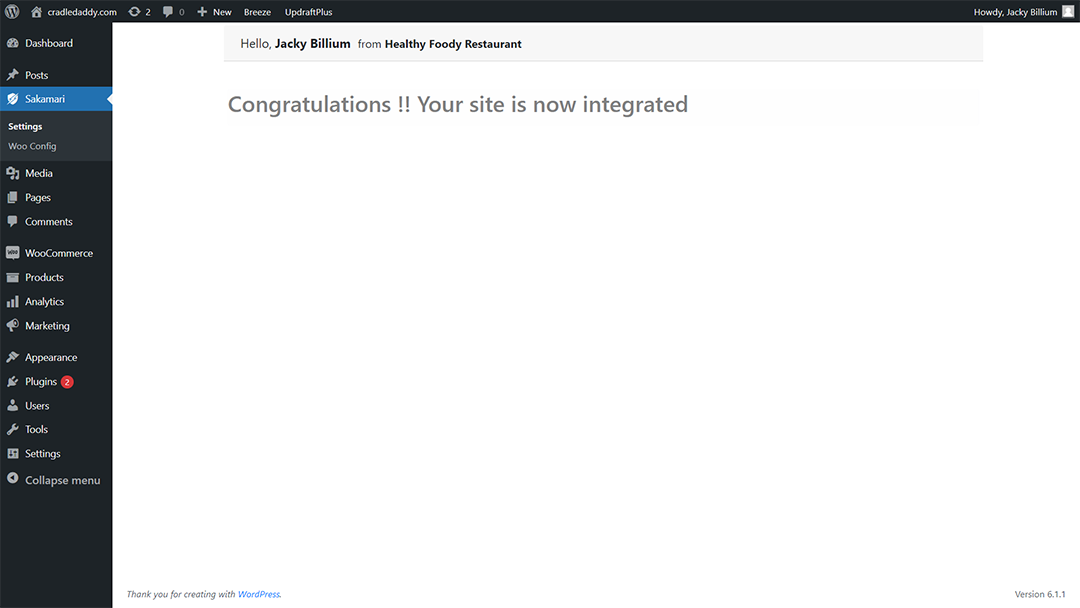
A successful integration will look similar to this.
It’s time to generate the WooCommerce integration Key and update in Sakamari
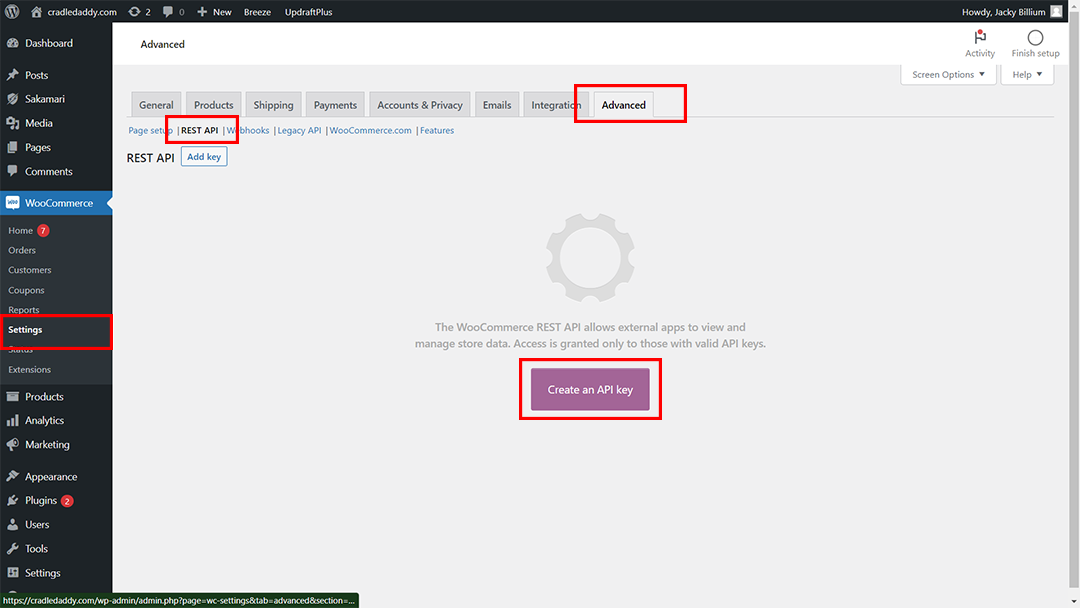
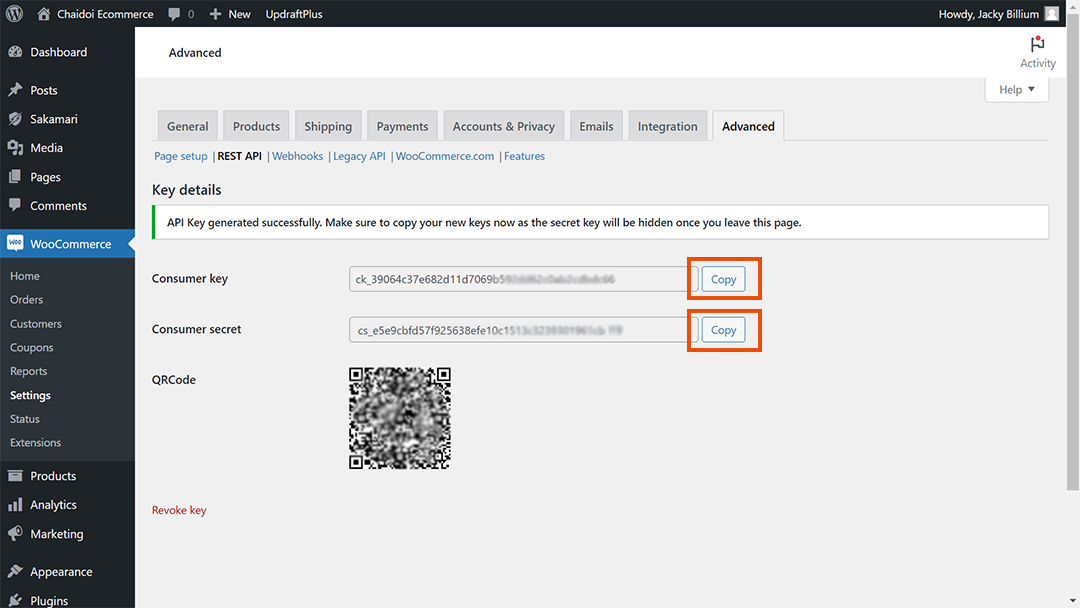
Go to WooCommerce > Settings > Rest API > Click “Create Key” button
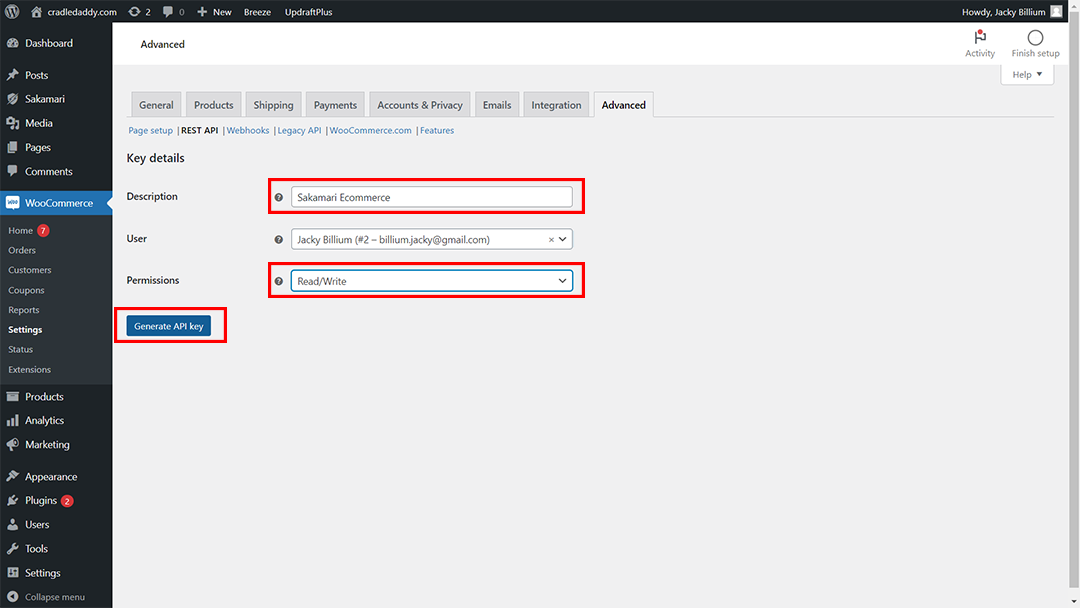
Write Description “Sakamari Ecommerce” > select the Permissions “Read/Write” > press “Generate API key”
Copy the “Consumer Key” and “Consumer Secret” in Notepad / any other text editor you prefer
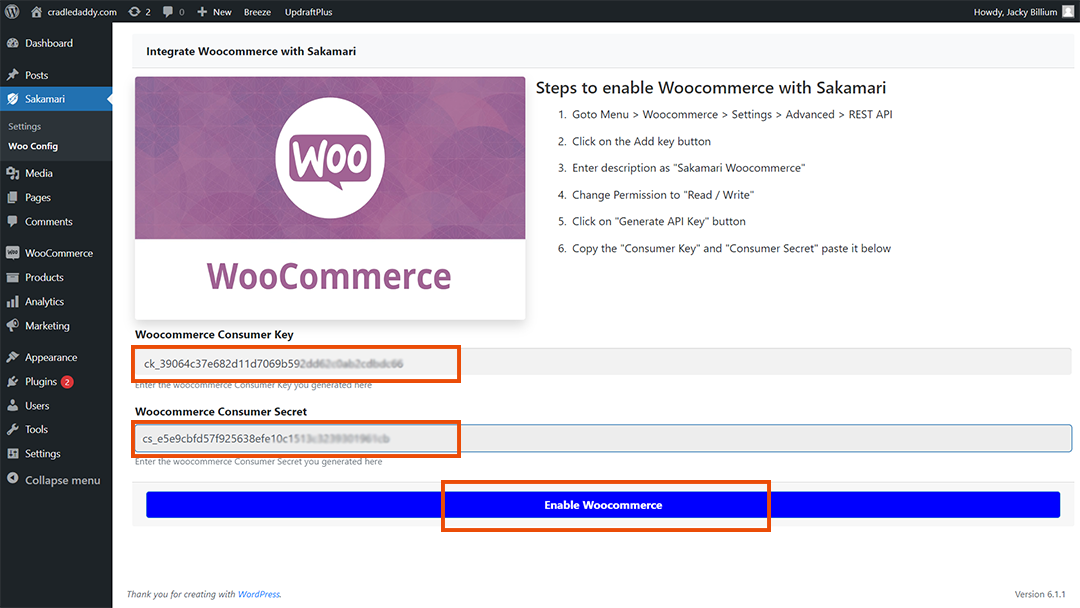
Go to Sakamari > Woo Config and paste the keys in the respective text boxes as shown > “Enable Woocommerce”
Your woocommerce site shoud now be connected to Bilzee Ecommerce Console via Sakamari WordPress Plugin.
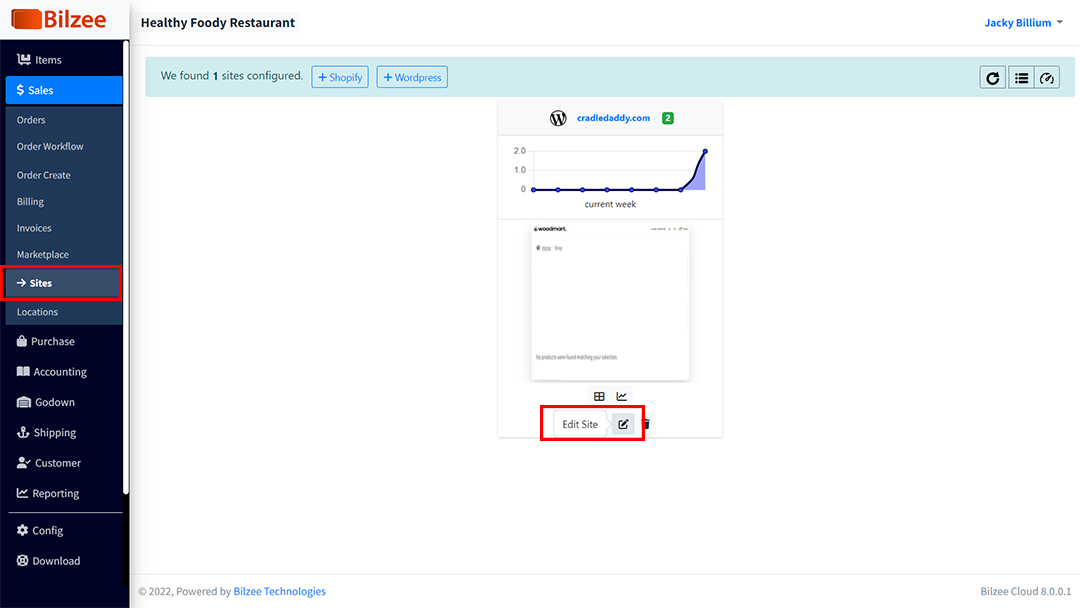
Back to Bilzee. Go to Sales > Sites – you should see your site listed as shown.
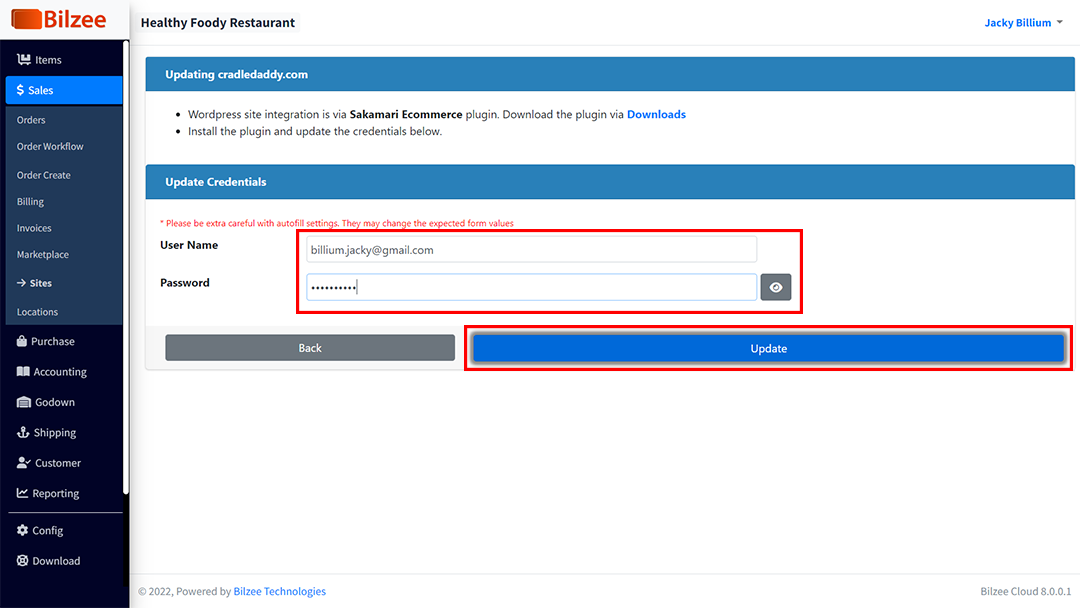
Now edit the site to update the WordPress Admin Credentials
Please make sure that you enter the correct admin user credentials as there is no way to validate the credentials with WordPress.
Now press “Update” button.
Now we are done with the configurations.
Time for some action !!!
Step5: Publish Items to Ecommerce Site
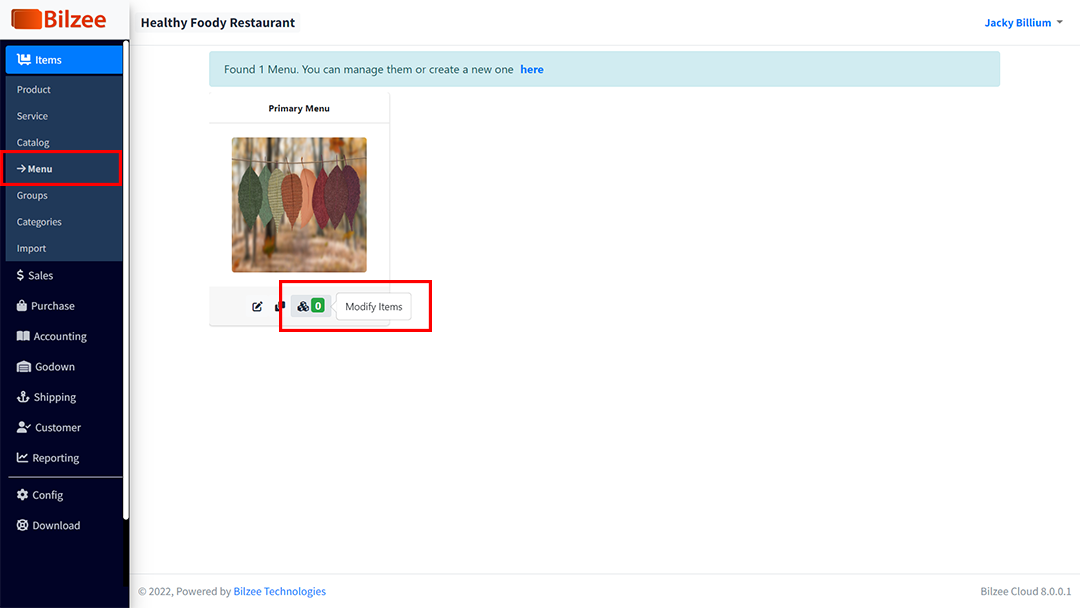
Go to Items > Menu> click the “Modify items” button as shown
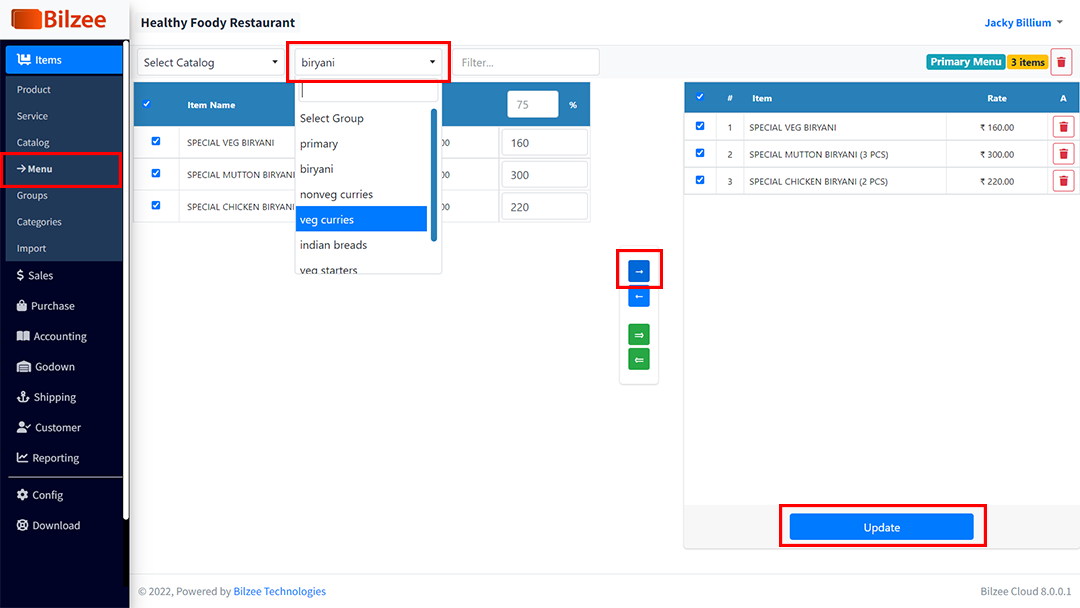
You can add / update items as necessary. Change the rates and press update to update the menu items.
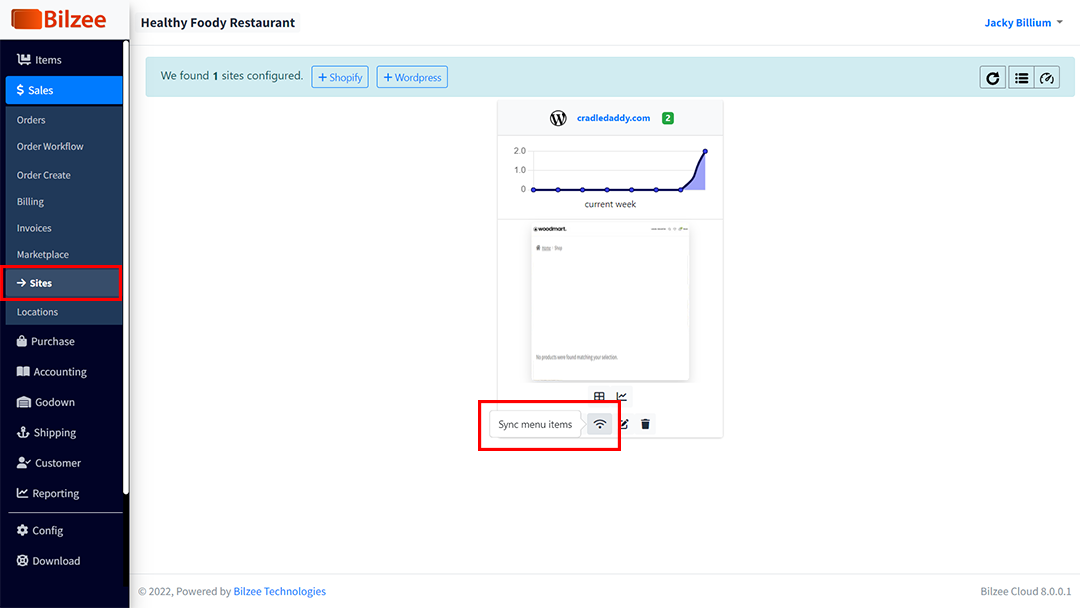
Now Go to Sales > Sites > click on the “Sync menu items” button
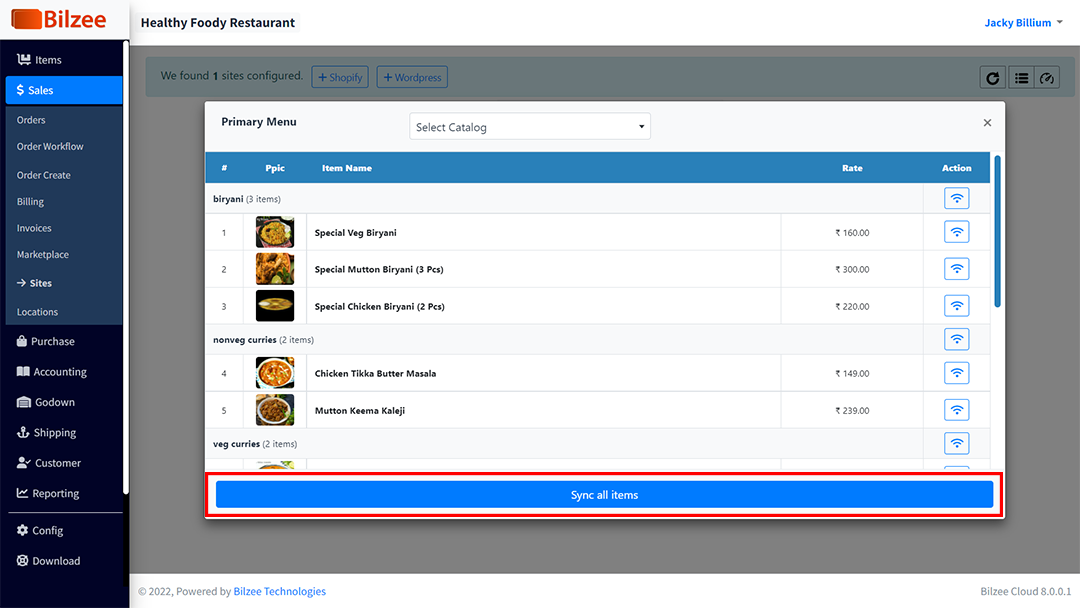
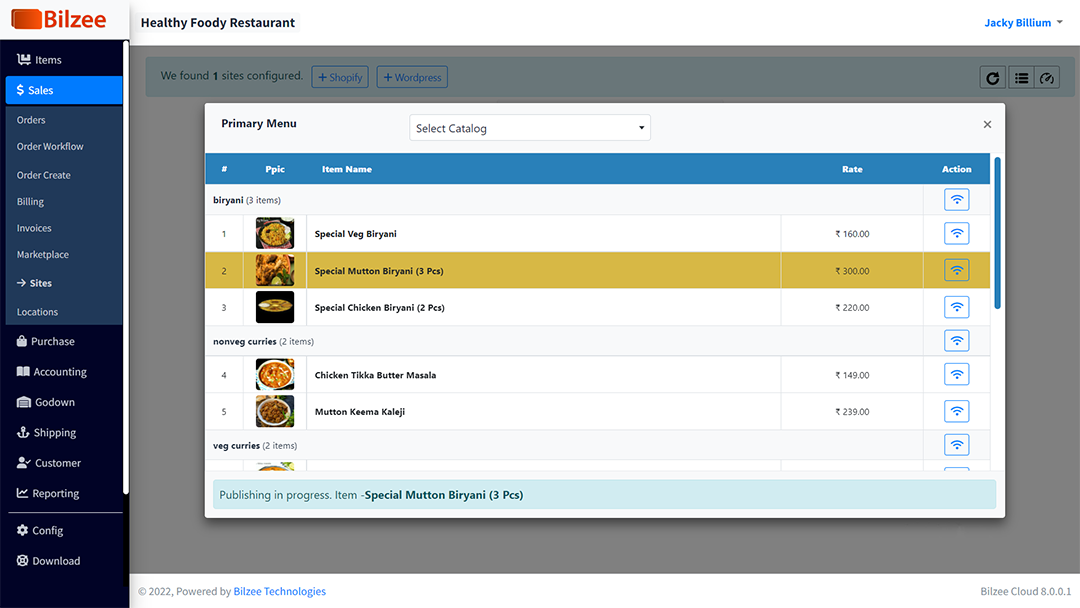
This should bring up the Item publishing view where you can publish individual items or all the menu items together.
Item publishing in progress. Once this completes your site should be ready for customers.
All done now
It’s upto the Bilzee Ecommerce administrator to publish the items to the Ecommerce site. The administrator holds the right to change items / categories / rates as required for sales.
Thank you for reading this article. For any feedbacks or suggestions please write to us : support@pearnode.com

